Concrete installations can last decades or even centuries. However, sooner or later, most end up developing cracks, gaps, holes, and crevices. This can make your business establishment unsightly to customers. Moreover, if the surfaces are uneven enough, this can even pose a tripping hazard. If your cement path, patio, or parking lot has started to show its age, it’s best to make the necessary repairs as soon as possible. As the cracks and crevices widen, they become more difficult and costly to fix. In some cases, hiring a standard independent contractor is necessary to repair the damage. On the other hand, for smaller cracks, you can significantly cut expenses by doing it in-house. In this post, you’ll learn several guiding steps to cement crack repair and sealing.
Chisel The Crack
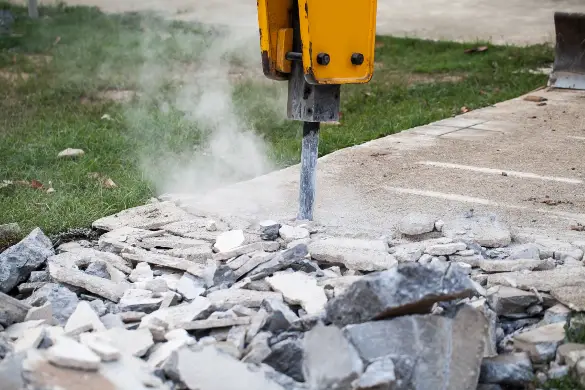
Before you can repair the cement fracture, you need to chisel the crack. This diminishes the amount of debris inside the fissure, optimizing the filling process. Use a cold chisel and hammer to get rid of any large pieces of concrete in the crack. Ideally, you should hold the chisel at an angle. Pound with the hammer to chisel out the fracture. This is known as “keying” the hole to make the inside of the crevice wider than the surface. Keying cleans the crack so the new bonding material can bind to the old cement. It is essential to chisel the crack prior to repairing it with sealant to ensure a more durable repair.
Remove Debris From The Crevice
Once you’ve chiseled the crack, you need to remove excess debris from the crevice. This step is imperative to a successful cement repair. Optimally, you should use a wire brush to excavate loose material from the fissure. If desired, you can use a pressure washer or even a garden hose with a spray nozzle. The added pressure helps to expel larger particles from the rift. Next, you need to use a wet/dry shop vacuum or brush to eliminate all of the water and debris from the crack. Carefully, try to get all of the dust and grit out of the area. It’s okay if some of the surfaces are still damp. However, there should be no pools of water. Removing the debris from the crevice is a crucial step in the masonry repair process.
Choose A Cement Repair Product
Based on the size of the crack that you are sealing, you need to choose a cement repair product. It’s important to know that concrete surfaces cannot be repaired with plain concrete. Instead, you need to use a concrete mix. These are readily available at hardware stores and online. Generally, your options include epoxy compounds, latex patching material, and mortar mixes. Mortar mixes work best to fill large cracks or chipped edges. On the other hand, epoxy and latex compounds are best suited for cement cracks 1/8-inch wide or narrower. When choosing a product, keep the color of your current fill in mind as well. When sealing floor, path, and patio cracks, it is vital to choose a cement repair product.
Inject The Sealant
After you’ve chosen a cement repair product, you need to inject the sealant. When working with cement-based products, always wear eye protection and waterproof gloves. Depending on the type of sealant that you chose, the steps will vary slightly. Always follow the manufacturer’s instructions on the label of the mix. Generally, for epoxy injections, you cut the tip of the nozzle on an angle with a utility knife to match the width of the crack. Then, you load it into a standard caulk gun. You slowly draw the caulk gun down the crack, forcing a bead of caulk deep into the crevice. If using a self-leveling polyurethane sealant, the process is similar but may require an additional application. Injecting the sealant is one of the most important stages in the concrete repair process.
Blotting and Smoothing
Once you’ve injected the sealant, you need to blot and smooth the area. Blotting protects uncured crack treatment from cracking under heavy traffic. Proprietary detackifying products are available that are designed particularly for blotting crack sealant. Other common products can also be used. For instance, toilet paper, talcum powder, limestone chips, and sand are all materials that you can use to blot the area. If you’re just looking to smooth the area, you can simply use a plastic spoon. For polyurethane sealants, you need to use a special solvent or citrus-based cleaner to remove excess product. Blotting and smoothing is important to conduct an aesthetically pleasing and successful repair.
There are several important guiding steps to follow to repair your business’s concrete foundation crack. First, you need to chisel the crack to loosen excess debris inside. Then, you need to remove the debris from the fissure using a wire brush or pressurized washer. Once the area is clean, choose a cement repair product that is suitable for the area based on size of the crevice and color of the current material. You can then inject the sealant and blot and smooth any excess using various solvents or household items. Consider the point mentioned above for your business’s cement crack repair and sealing.
 Business First Family Business, Accounting, Finance, Investing, Marketing And Management